Pro-Only: Animancer Lite allows you to try out this feature in the Unity Editor, but it will not be available in runtime builds unless you purchase Animancer Pro.
When you play an animation, it stops all others (or Fades them out). More specifically, it stops all other animations on the same layer without affecting animations on other layers. This allows you to play multiple separate animations at the same time, using the layers to determine how they combine to form the final output.
Examples
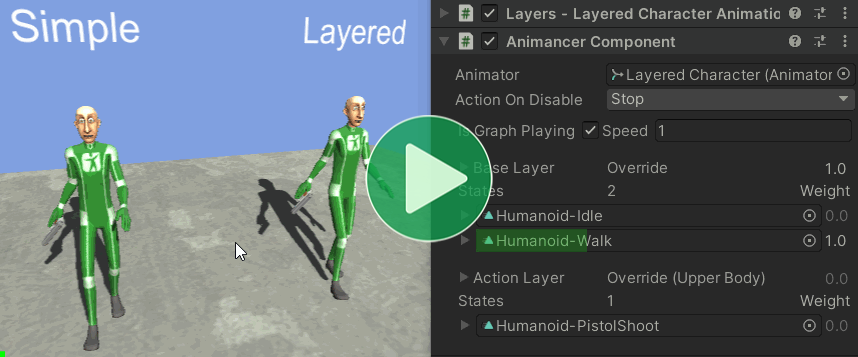
Basic Layers
The Basic Layers example demonstrates how Idle, Walk, and Shoot animations can be used with layers to allow a character to shoot while walking without needing a specific ShootWhileWalking animation:
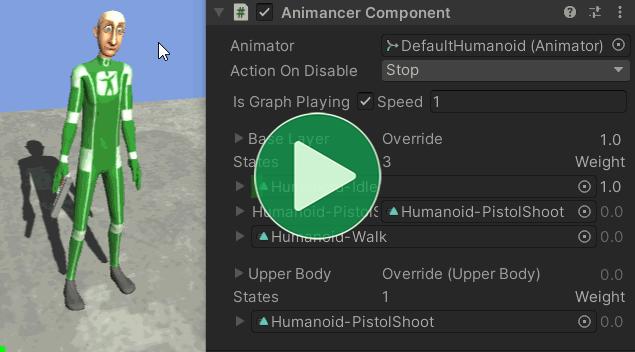
Dynamic Layers
The Dynamic Layers example demonstrates similar behaviour, but allows the Shoot animation to control the whole body if the character would have been Idle so they place their feet more appropriately:
Quick Example
Most operations involving layers are accessed via the AnimancerComponent.Layers property:
AnimancerComponent animancer;
AnimationClip clip;

// Create a state on the default layer 0 and play it.
// If a state for that animation already existed, leave it on its current layer.
animancer.Play(clip);

// Create a state on layer 1 and play it.
// If a state for that animation already existed, move it to layer 1.
// If layer 1 did not already exist, accessing "Layers[1]" creates it.
animancer.Layers[1].Play(clip);
Details
- New Layers: if you specify a layer that does not exist, it will automatically be created (along with every layer before it).
- Changing Layers: if an
AnimancerStatealready exists for the animation and you specify a different layer, the state will be moved to that layer. This change can't be blended directly, but the Dynamic Layers example demonstrates how you can achieve a similar result. - Names: you can call
SetDebugNameon a layer to give it a name that will be displayed in the Inspector, however these names do not exist at runtime so any calls to that method will be automatically compiled out of runtime builds. - Keys: if you want to play the same animation on multiple layers at once, you will need to create multiple states for it and register them with different Keys (or not register them at all and simply keep references to them yourself).
Blending
There are several different factors which determine how the output of each layer is combined to form the final result:
- Weight: each layer has a
Weightjust like anAnimancerStateand you can use theirStartFademethod to Fade them in and out over time.StartFadeonly affects the layer you call it on and there is noCrossFadefor layers because it's not common to swap them like that, however you can simply fade one in and the rest out if you need to.- Layers start at
Weight = 0by default. However, callingAnimancerComponent.Playtargeting a layer at 0 weight will automatically set itsWeight = 1. - Similarly, Cross Fading will actually
Playthe animation atWeight = 1immediately and fade the layer in instead of fading the animation. - If you want a layer to stop affecting the final output, you can simply fade its weight to 0 (or set its
Weight = 0to do it instantly).
- Masks: each layer can be given an
AvatarMaskto determine which bones it affects. You can create a mask using the Assets/Create/Avatar Mask menu function and then assign it to a layer usingAnimancerComponent.Layers.SetMaskso that animations on that layer will only affect the parts of the model included in the mask. - Additive Blending: by default, each layer will override the previous layer, entirely replacing its output. You can instead have a layer add its animations on top of the previous layer using
AnimancerComponent.Layers.IsAdditive.